Pages

Tuesday, July 31, 2012

Dresser makeover.........

We’ve got a couple of projects going this summer! It’s been fun and we’re trying to get these things done by the time the kiddos go back to school. (Hopefully not just wishful thinking, LOL!)

We recently painted Ms. M’s room a pretty grey color (post coming soon with pics) and she decided to do a more “grown-up” look. We looked through different images online, and she really liked the fleur de lis! She also loves the damask look as well. I told her she was going for a French-country kind of feel for her room (of course, she looked at me kinda puzzled, but I’ve seen that look before) {Well, maybe she was just looking at me saying “Gees Mom, you’re crazy”, but I’d like to think the former, rather than the later!}

Anywho, she had a dresser that we had painted white about a year ago, and, of course, it’s gotten chipped a little, but that “chipped” look is so in right now (which is good, ‘cause I didn’t feel like repainting it anyway). We gave it a facelift with some of the leftover paint on the front of the drawers, then applied some fleur de lis in white vinyl (oh yeah baby, I LURVE my Silhouette!). This was my first project with vinyl, and I can see that I’ll be putting vinyl on anything that will stay still long enough **snicker**. Love, love, love!!!!! This is how it came out……..


We bought this dresser for $40.00, so with some leftover white paint and paint from her room re-do, we don't have too much $$$ in this and it's a great addition to her room! I love frugal decorating :) AND, we’re still not done! Ms. M. came up with a cute idea for the other two drawers, and we’ll let you see that one tomorrow! (I know, I’m such a teaser!)

I'm sharing this decorating idea with the following link-up parties:

CraftOManiac
TaterTots and Jello
Design Dazzle
Uncommon Designs
Savvy Southern Style
The 36th Avenue
Five Days, Five Ways
French Country Cottage
I Should be Mopping the Floor
At the Picket Fence
Between Naps on the Porch
Stringtown Home
Be sure to go by and see all of the other great ideas for DIY crafting!

Sunday, July 29, 2012

More beach-themed items.........

I’ve been trying all week to get my items together for my beach pianoscape, but with all of my best intentions, I still haven’t pulled it together. I’m looking for that one piece, you know, the one thing that will just pull everything together, but I haven’t found it yet! LOL!

Here are a couple of the elements I have so far

Pretty sea blue glass votives: got these at Michaels for 60% off of the $1.99 price tag. Not too bad for .80 each and I know I’ll be able to reuse them for something else (probably 4th of July and January for a snowflake theme).

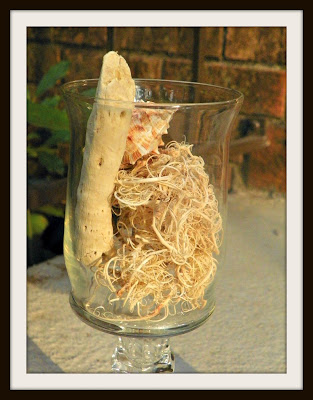
I also got a bag of shells at Michaels, in their $2.00 section, with a bunch of pretty ones! And a couple of pieces of drift wood! I didn’t want a huge bag of them, so this worked out perfectly!


Do y’all have any ideas on what that “ONE PIECE” could be? I really want to wrap up this pianoscape this week. We have painted my daughters room, so I need to get busy decorating that !

I'm sharing this decorating idea with the following link-up parties:

CraftOManiac
TaterTots and Jello
Design Dazzle
Uncommon Designs
Savvy Southern Style
The 36th Avenue
Five Days, Five Ways
French Country Cottage
I Should be Mopping the Floor At the Picket Fence Be sure to go by and see all of the other great ideas for DIY crafting!

Tuesday, July 24, 2012

Starfish wrapped candles...... beach theme #1

Here's one of my first project that I completed (super duper fast too!) for my Beach-themed pianoscape that I'll be working on this week.

I bought these two pillar candles at Dollar Tree (the best thing is, you can reuse these candles for ever, so it's just the initial $2.00 expense!). I had some of the awesome fabric leftover from my Photo Pillow project and my Beach insprired wreath to wrap around the candles. I hot glued the piece on (just where the fabric overlaps each other, that way I can take these off to reuse the candle), then attached the starfish. Easy-peasy decorating! These starfish were only .40 each, so basically under a $1.00 for this project (of course, if you need to go out and purchase the candles it will be a $3.00 project! LOL!).


Please stop by each day as I try and get another beach-themed idea for you!
Linking up to these great decorating parties:

CraftOManiac
TaterTots and Jello
Uncommon Designs
Savvy Southern Style
The 36th Avenue
Five Days, Five Ways
French Country Cottage
I Should be Mopping the Floor
At the Picket Fence

Friday, July 20, 2012

Beach-time Door Wreath

It's Beach time!! Yep, you can say I'm a little behind on my summer decor, but ya know, down here in the deep south, summer is here for a while!

As always, I thought about this theme and color combo waaaayyyyyy back in February, but I'm just now getting to it (better late than never!) And, I have a new TOY that is making this a little bit more fun to put together!


Yep, that's right my friends, a brand-spankin' new Silhouette CAMEO! My mom and dad surprised me with it last weekend, and me and Ms. M. have had a great time making its aquaintance. There is so much I can do with this machine, I just haven't had a chance to sit and play with it like I'd like to. It helps a little today as I have every single one of my orders done and shipped!

I've seen all of those pretty yarn-wrapped wreaths and just had to make one myself! I used a $1.00 pool noodle for the base, I had a big ball of white yarn already, and bought 1/4 yard of both turquoise and yellow felt for the felt flowers (and I have plenty of felt left over for another project!). I purchased a box of 3 star fish at Michaels in the $$$$ section ($2.00, with a 40% coupon). I had the muslin-like fabric from my photo pillow project for the banner, so I was ready to go.


Yep, I used my new toy to make the cute letters on the banner(the font is called Strawberry limeade, available for free at fontspace!) I made them with the self adhesive cardstock paper.


As always, I can't thank you enough for stopping by! I've got a beach-themed pianoscape that I'll have pictures of starting Monday! Hope to see you back then!

I'm sharing this decorating idea with the following link-up parties:

CraftOManiac
TaterTots and Jello
Uncommon Designs
Savvy Southern Style
The 36th Avenue
Five Days, Five Ways
French Country Cottage
I Should be Mopping the Floor
At the Picket Fence

Monday, July 16, 2012

Anniversary pillow

My Mom and Dad recently celebrated their 46th wedding anniversary. I really wanted to come up with something that would take them back to that day that they both said "I do".

I just happened to have one of their wedding pictures in my picture stash, so all I had to do was scan it into my computer. Then I grabbed one of the sheets of Iron-on Print n Press transfer sheets (from Hobby Lobby, only $5.99, minus the 40% coupon of course!) and printed out their picture.

Then I measured out 2 pieces of 14" x 14" fabric (the kind I chose was the kind of fabric that they use to recreate civil war type of costumes, I can't remember what it's called, but I love it!). Followed the directions from the Print n Press on how to iron on the photo, then used my Babylock to monogram the pillow with their name and when they were established! :) I know y'all know how to make a pillow, so I won't go into that for ya!

Needless to say, I think it was a big hit! This color matches their bedroom perfectly! Would have been great to do a black and white or sepia toned picture too!


Thanks so much for stopping by!!!! I think I'll be making some photo pillows for the kids. Would be great to do one when they were just a tiny baby!

I'm sharing this decorating idea with the following link-up parties:

CraftOManiac
TaterTots and Jello
Uncommon Designs
Savvy Southern Style
The 36th Avenue
Five Days, Five Ways
French Country Cottage
I Should be Mopping the Floor
At the Picket Fence

Tuesday, July 10, 2012

Free Sample of U by Kotex...over at Walmart.com


There is a free sample of U by Kotex over on Walmart.com today. Be sure and go HERE to sign up for your sample and free clutch (while supplies last!) You'll need to PIN a board to get your free sample, but it's really easy!

Also, while you're there, check out the free coupons and other free samples that they have each day. Don't forget, most of the time when they send your free samples, you'll get high-dollar coupons too!

Monday, July 9, 2012

Make your own plates ~ Another Dollar store craft

These plates were so much fun, and super-duper easy to make too! I bought 2 ceramic plates at Dollar Tree the other day....thought this would be a fun weekend craft for Ms. M. and I to try out. I've seen these on Pinterest before (I know, who hasn't, right?) and was a little skeptical on how they'd turn out (the markers not washing off). Well, I was delightfully surprised!

As you can see, Ms. M. is at the table with all of our supplies: plates, sharpie markers (in a ton of colors!), tape for our home-made stencils, and that's it! (Oh my, oh my, this would be so much easier with a Silhouette! LOL!....Santa, can you hear me???????)


All we did was figure out ahead of time what we wanted to do. Just beware, once you've marked on the plate, you can't erase it, so we were pretty careful :)

I wanted to do a monogrammed initial plate for my soon-to-be initial wall in our bedroom. I'm pretty happy with the way it turned out.


I wasn't sure of what Ms. M. had decided to do, but I LOVE what she did!


This is a great idea to do with the kids, especially when it's 98 outside, with a heat index of 110! It didn't take us long to make them. After you get done with your art, place in a 150 degree oven for 30 minutes and they're done!

Great idea for a grandparent would be to outline the kids hands on a plate, have them color it and date it! I love the monogram plates too....very frugal idea for a dinner party and will only cost you $1.00 per plate!

I can’t thank y’all enough for stopping by and taking a peek into my little craft world! Please be sure to leave a comment, I love and read each one!!! I'm sharing this decorating idea with the following link-up parties:

CraftOManiac
TaterTots and Jello
Uncommon Designs
Savvy Southern Style
The 36th Avenue
Five Days, Five Ways
French Country Cottage
I Should be Mopping the Floor
At the Picket Fence

Friday, July 6, 2012

Ball Jar Soap Dispenser.....Dollar Craft

I know, I know. These cute little Ball jar soap dispensers have been all over the ‘net, ‘specially my favorite, Pinterest! (By the way, come on by and follow me HERE .) But I just figured that on the off-chance of someone not finding the directions, you could use mine!

The way I did mine came out to $1.00! Yep, just one smack-a-roo. Thrifty and frugal, gotta love it! I already had the jar (given to me), so all I needed was the hand soap from my local Dollar Tree.


It was a cute dispenser anyway!

Here’s a quick list of what you’ll need:

1 Ball jar, any size
1 container of hand soap (be sure it also has the pump)
6000 glue, pliers, either a drill with large bit, or just a large nail and hammer

For the lid, all I did was start a hole in the center. I worked my pliers, pulling back the tin until I had a hole big enough that would accommodate the pump. (This part was easy, as the tin is not especially thick.)


As soon as you know it fits, take 6000 glue and glue the cap around the pump to the lid. I put it between two blocks to let it dry overnight.


Just be sure that the hose just touches the bottom of your jar (I had to cut mine a little to make it shorter). Pour in the soap, then attach the lid and jar ring. There you have it! So kitchey-cute, great for presents with jute twine or initials done in vinyl!

Pin It

I can’t thank y’all enough for stopping by and taking a peek into my little craft world! Please be sure to leave a comment, I love and read each one!!! I'm sharing this decorating idea with the following link-up parties:

CraftOManiac
TaterTots and Jello
Design Dazzle
Uncommon Designs
Savvy Southern Style
The 36th Avenue
Five Days, Five Ways
French Country Cottage
I Should be Mopping the Floor
At the Picket Fence
Be sure to go by and see all of the other great ideas for DIY crafting!

Fingerprint Friday....

There is a song by Steven Curtis Chapman that says:
I can see the fingerprints of god
When I look at you
I can see the fingerprints of god
And I know its true
You're a masterpiece
That all creation quietly applauds
And you're covered with the fingerprints of god

So look around you and see where YOU can see God's fingerprints. Is it in nature? Kids? Animals? Where do you see them?


I was in the back yard pulling up mushrooms last week (it's amazing how these things will sprout up over night!) and just happened to turn one over. WOW! How intricate! I was awed at how each flange on the mushroom was made and spaced apart......only our God could create something so pretty! Mushrooms pretty? Why yes! I'm prone to see the beauty in God's creations in just about everything, but never thought about mushrooms......What about you?

Be sure to take a look at Beki's Blog to see the other "Fingerprints" from today!

LinkWithin

Related Posts Plugin for WordPress, Blogger...
UA-9462558-2