Pages

Sunday, April 8, 2012

He Lives!

Hoping you have a BLESSED Easter!!!

Words and tune by Alfred H Ackley, 1933. Picture by me.

Tuesday, April 3, 2012

Southern Smothered Quail..... Yum!!!

We love Quail around this house! If it were up to hubs, we’d have a mess of it in the freezer from hunting season, but unfortunately we can’t seem to find a really good hunting spot, YET! There’s one out there somewhere! So, we cheat a little……… we are able to get a box of 36 quail at a local grocery store. Regular price is $34.99, but we wait until it goes on sale for $19.99, so we stock up.

So for years I’ve been doing the regular fried quail. Very good, but nothing that makes your tounge jump up and slap the roof of your mouth! Plus, it seems whenever I fry something, I don’t really like eating it, probably because I’ve got that “grease” feeling all over my clothes, hair, etc……. Anyway, I was looking for a quail recipe in an amazing recipe book that hubs and the kids bought me for my birthday one year, and I think I’ve found THE recipe! I’ve made it twice in the last month, and it’s definitely a keeper, and a FAVORITE! It might take a little time, but trust me, it’s worth the effort!

You will need:
12 wash and cleaned quail
1 ½ cups flour
1 tbsp salt
¾ tsp pepper
1 stick plus 2 tbsp butter (yes, please use butter!)
4 cups chicken broth or 4 cubes of chicken bullion

Clean and dry the quail.

Combine the flour, salt and pepper

Dredge the quail in the flour mixture

Melt the butter in a skillet

Brown the quail in the butter, about 3-4 minutes on each side

Place the quail in a 13x9 pan…… Get ready to make the gravy!

Keep that LUCIOUS butter with quail drippin’s! Add 6 tablespoons of flour to the butter and wisk. Add a little salt and pepper and make the roux (stir constantly until it’s a pretty light brown color). Then add the chicken stock (or if you’re using the bullion, microwave the 2 cups of water, plus 4 cubes until dissolved, then add enough ice to make a total of 4 cups, the liquid needs to be cool to thicken when you put into the roux). Stir on high heat for about 2 minutes, then pour over the quail.

Cover with tin foil and bake in a 350 degree oven for 1 hour.

This is what our plate looked like.

We had rice and cornbread stuffing as our sides that night. I’m seriously telling you, this gravy is the best I’ve ever tasted! Such a smooth, buttery flavor…..that’s why I wouldn’t suggest using margarine this time LOL!

It does take just a little while to get the recipe started, but then the oven does the work for the last hour (about 30 minutes prep time). I really hope you enjoy making, and, of course, eating, this recipe!!!!

I’m thrilled that you’ve taken time to stop by and see my tutorial! Please be sure to leave a comment! I read each one and would love to hop on over to your blog too! I'm sharing this decorating idea with the following link-up parties:

CraftOManiac
TaterTots and Jello
Design Dazzle
Uncommon Designs
Savvy Southern Style
The 36th Avenue

Be sure to go by and see all of the other great ideas for DIY crafting and recipes too!!!!!

Saturday, March 31, 2012

Be still..... Subway Art Printable

Hey Everyone! This is my first attempt to make some SUBWAY ART!!! I love to incorporate this new art style into my decorating around the house, and I couldn't find what I was looking for to put into my pianoscape for Easter. I'm doing a natural, nature type of color scheme, so I thought brown colored fonts would be mighty fine!

And here it is:


Please feel free to right click, save to your computer, and print out! If you just happen to post or use this on one of your blogs or any type of social media, please link back to here..... I'd greatly appreciate it....MUAH!

If you have any problems, please leave a comment and I'll be glad to email it to you :)

God is good all the time.....All the time God is good!

I'm sharing this decorating idea with the following link-up parties:

CraftOManiac
TaterTots and Jello
Design Dazzle
Uncommon Designs
Savvy Southern Style
The 36th Avenue

Ivy and Elephants

Be sure to go by and see all of the other great ideas for DIY crafting!

Whitewashed Easter Blocks

I love to decorate…… I know, shocking, right? Let me show you my shocked face…….


LOL!

{You know, if you say SHOCKED several times, it really sounds weird! ANYWHO!}

As I was walking a couple of weeks ago, I spotted several wood blocks that someone had put in their trash pile (this house is doing a lot of reno….so hopefully I’ll be able to pick up some more!). Can you say FREE?!?!?! I have seen several of these painted blocks on Pinterest with words and sayings and already had an idea of what I wanted to do with them.

I got them out today to do my “thang” with ‘em. I’ve planned on doing my Easter pianoscape in a natural, neutral color scheme this year, so I’m figuring, white, beige, brown, wood, etc…….. So here’s what I did.

Here are the FREE blocks. I’m so glad they weren’t all the same size, makes them more interesting!

I bought a package of sponges at the Dollar Tree the other day. They come 4 to a package and they make great paint daubers! I just cut one of them thirds and that was plenty big enough.

I didn’t have a full tube of white paint, so I thought, let’s do a white-wash look. I put as much of the white paint I could get into a bowl and added water, stirred, and this is how it looked.

As with my Chevron Easter Egg Burlee door hanger , I printed out some lettering on my computer, then put tape over the lettering before I cut it out (to make it more sturdy for the stencil), then stenciled the saying out on the blocks.

And this is what it looks like, FINI! I did do a couple of streaks of the brown paint on the top and sides of the blocks to give it more depth.

Not too bad for FREE! (Yep, love that word!) I will be posting my pianoscape reveal later this week. I’m a little behind in decorating for Easter, but I’ll get there!

I’m thrilled that you’ve taken time to stop by and see my tutorial! Please be sure to leave a comment! I read each one and would love to hop on over to your blog too!

I'm sharing this decorating idea with the following link-up parties:

CraftOManiac
TaterTots and Jello
Design Dazzle
Uncommon Designs
Savvy Southern Style
The 36th Avenue

Ivy and Elephants

Be sure to go by and see all of the other great ideas for DIY crafting!

Hey Y'all, I'm super, super THRILLED that Jen, over at TaterTots and Jello featured this craft on her 32 Inspirational Easter Decorating Ideas! Seriously, I'm over here doing my HAPPY DANCE!!! Thanks so much Jen!

Tuesday, March 27, 2012

Kirklands giveaway over at Savvy Southern Style

I don't know about y'all, but I love Kirklands! Everytime we go to our mall, that's one place I just HAVE to go into! Well, Kim over at Savvy Southern Style is giving away a $50.00 gift card to Kirklands! All you need to do is leave a comment and tell her what you'd purchase at Kirklands if you were to win! Easy Peasy Lemon Squeezy! There are additional ways to enter to, so stop on by!

I just love the Espresso Panel Curtains....they'd go great in my living room! Good Luck!

Sunday, March 25, 2012

Estate finds....Frames and jars

I love finding little treasures! While Ms. M and I were out this weekend, we came across an Estate Sale. While perusing all of the goodies, I came across several frames that I desperately wanted to have. But, for anyone that knows me, I’ve got to get them at a good price! Although $1.00 was a steal, I figured if they were still there today (1/2 price day!!!!), they were meant to be mine!

When we arrived, I made a bee-line for where they were, and voila!, they were still there…YES! So, I just had to get all 6, and at only .50 for each one, it made my pocket even more HAPPY!!!

As I was taking one last look around, I spied this awesome little apothecary jar with a sterling silver band…….Can you say SAAWWEEEET! I love ½ price days, so this little beauty was only $2.50.


All-in-all I spent $5.50 for 6 frames and 1 apothecary jar. Thrilled is just an understatement! I’m lovin’ the twin frames, so plan to get my paints out this week and make them real PURTY!!! Please come back by later for my reveal. I’m sure you’ll see them in an Easter table scape! Y’all be sure to leave a comment! I read each one and would love to hop on over to your blog too! I'm sharing this decorating idea with the following link-up parties:

CraftOManiac
TaterTots and Jello
Design Dazzle
Uncommon Designs
Savvy Southern Style
Be sure to go by and see all of the other great ideas for DIY crafting!

Sunday, March 18, 2012

Chevron Easter Egg Burlee

I am so EGG-cited to show you my newest craft! I get so many great ideas from different places: Pinterest, antique stores, HGTV, and link-up parties! I’ve loved all of the crafters out there that have made these awesome door hangers with burlap, or BURLEES like a lot of them are called ;)

I really wanted something done for Easter, and just happened to have a perfect cut of burlap left over from my Button Cross project. I’ve searched on the web and sooooooo many of these cute burlees are really expensive! So, of course, knowing that I just couldn’t shell out between $30-$50 for one, I had to come up with my very own.

I’ve been falling for chevron ANYTHING lately, so I decided to do my very own burlee Easter egg with a chevron print! Here’s how I did it:

Materials needed:
Burlap
Your choice of paint, two colors
Sponge paint brush
Floral or painters tape
Small piece of ribbon or wire 6”
1 yard tulle
Hot glue gun, thread, sewing machine

First I had a piece of burlap, when folded in half, came out to about 16” x 21”. I hand drew the shape of an Easter egg on it then cut it out. Then, with some floral tape {painters tape would work really well too}, I started cutting pieces of tape to a length I thought would be good for the chevron print {It did take a couple of times to get the first row right, but then after that, it goes pretty fast}. I was lucky that I had the help of Ms. M to cut the tape for me, then I eye-balled the layout and this is what it looked like:

WHEW! This part did take about 30 minutes to do, but was glad I took the time to get it done right.

Then, with a couple of boxes under the burlap, I started stippling on the pink paint like this:

This is what it looked like when it was all done:

Remove the tape and this is how it will look:

I let it dry overnight………. While that was drying, I figured I’d love to make it a little more personal, so printed out “The Hutchison’s” in a font that I love called BLACK JACK.

And, of course, this part took about 45 minutes to cut out to make a stencil {Did this while watching “Fairly OddParents” with the kids, ‘cause I’m a good Mom like that. Took about 1 ½ episodes! LOL!}. I would recommend maybe taping over the paper with clear packing tape to give the stencil a little more stability before cutting out {just a little helpful hint}, and use small, really sharp scissors if you have them.

Stippled on some pretty dark brown umber paint over this stencil, let it dry for just a little while, then peel off.

For the “stuffing”, I used some tan colored plastic grocery bags! You know, reduce, reuse, recycle! They were the perfect filler. Just sew (or hot glue) around the edges, {be sure to leave some stuffing room}, stuff, then sew or glue shut.

I bought 1 yard of a pretty shimmery brown tulle at Hobby Lobby for .99. Just make into a bow and hot glue to the top of your egg. I added a loop of ribbon to the back to hang on the door. Here’s the finished project………

Pin It
I’m sure this will be the first of many burlee’s that will grace my front door!

Y’all be sure to leave a comment! I read each one and would love to hop on over to your blog too!

I'm sharing this decorating idea with the following link-up parties:

CraftOManiac
TaterTots and Jello
Design Dazzle
Uncommon Designs
Savvy Southern Style
Be sure to go by and see all of the other great ideas for DIY crafting!

Friday, March 16, 2012

Fingerprint Friday.......The everyday things

There is a song by Steven Curtis Chapman that says:
I can see the fingerprints of god
When I look at you
I can see the fingerprints of god
And I know its true
You're a masterpiece
That all creation quietly applauds
And you're covered with the fingerprints of god
So look around you and see where YOU can see God's fingerprints. Is it in nature? Kids? Animals? Where do you see them?


I'm so thankful to have my eyesight! I always take it for granted, especially when I can see and photograph the awesomeness of God's creations!

Be sure to take a look at Beki's Blog to see the other "Fingerprints" from today!

Monday, March 12, 2012

In Bloom.......

This has been such a mild winter, so everything here in the South has started to bloom! I don’t ever remember our Azalea bushes showing off their color in the middle of February, but that’s when they started! Now the bushes are just alive with color, along with our yellow pollen-laden cars! {That’s the only think I DON’T like about Spring, but hey, take a Zyrtec and live with it, right? LOL!}

I just LOVE to photograph flowers. Don’t know why, but I do. I guess because they’ll sit still long enough for me to adjust my manual mode to get just the right setting {unlike kids or dogs!}.

As I was walking around our house the other day, here are just a sample of what’s IN BLOOM right now……

Azaleas.....


Dogwoods......


Tea Olive.....


Peach colored Azalea....


Wisteria.......


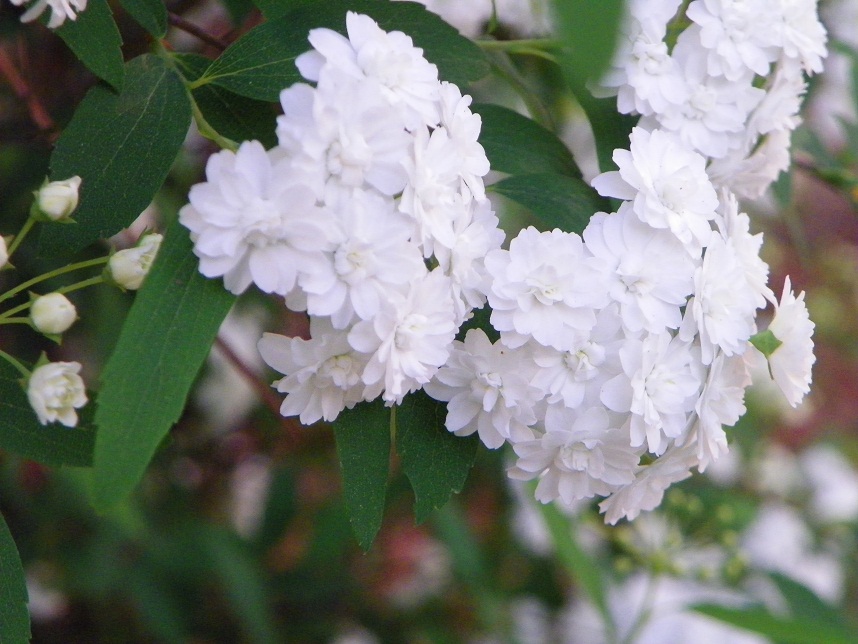
Bridal Bush.....


These will turn into dew berries (or I call them Blackberries!LOL!)


Not sure what this is, but it's filled with beautiful yellow flowers and provides awesome shade in the summer for the dog! Good thing you can't see all of his HOLES underneath :)


GORGEOUS Crimson colored Azalea........


Lantana! We've got so many "volunteer" Lantana bushes. Bring on the Butterflies!


And this Honeysuckle is about ready to burst with color and SMELL! I think I've got this on all of my fences!


We’ve also been BLESSED with rain this early spring! For the last couple of years we’ve been in severe drought conditions, so two of my prettiest Azaleas didn’t bloom, and I was a little concerned they had died for good. But, as you can see, they are doing well and will hopefully have a full showing this year!

I hope you enjoyed this garden tour! :)

LinkWithin

Related Posts Plugin for WordPress, Blogger...
UA-9462558-2