Pages

Showing posts with label home decor. Show all posts

Tuesday, August 21, 2012

Paper Napkin Wreath Tutorial

It's amazing what can inspire you. I saw the cutest package of paper napkins at the dollar store about a month ago. Ms. M is getting a total reno of her room (hmmm, do you still call it a reno when you're not knocking down walls and just painting and decorating??? What do you think?) Anywho, when I saw the napkins, I knew I needed to get them, but still wasn't sure what I was going to do with them (yep, I have waaayyyy tooooooo much of that stuff in the house, you know, for future projects!) Well, this time it didn't take me long to know what I was going to do!

Can you say WREATH TIME? All I needed for this project was a pool noodle, scissors, package of napkins and tape. Yep, only 4 ingredients items! {thought I was cooking for a moment!} {Oh, and I did have a rotary cutter, mat and the ruler thingy, but you really don't need them, as long as you have scissors you're good to go!}


The napkins measurements were 13" x 15 3/4". All I did was unfold them from the package, and cut 4" strips (of course, the last one was only 3 3/4"). Then unfolded the strips and cut on the folded line of each one. I had a ton of these when I was done cutting all of them! (No, I'm not gonna do the math right now, too tired, {{{{YAWN}}}). I used every one of the little squares to fill up the pool noodle.


Once I had them all cut, I took the end of my scissors and started making slits in the noodle. I gently pushed the center of the napkin into the hole, and repeated the process until the whole thing was covered ;) Seriously, how easy can it be? Time consuming.....um, maybe just a little, but it will go by fast when you're sitting on the couch watching TV with the Hubs! I guess you could put a little glue on the napkin before you poked it in, but I decided not too.


Right now I decided to put the personalized glass ornament hanging from the top of the wreath for a decoration, but might change it out later. This is just another element that we've added to Ms. M's more 'grown-up' room.

I hope you've enjoyed this easy, easy tutorial! I'd love to hear from you if your visiting :) Comments make me smile!!! Please feel free to follow me on GFC or via Linky Followers! If you have a blog of your own, please leave a comment, as I'd love to follow your blog as well!

QUICK QUESTION FOR ALL OF YOU DIY-ER'S: When you do a room reveal, do you have EVERYTHING done for decorating, or do you show a majority of what's been done, then have new posts for items you've added after the reveal? Thanks so much for your help :)

Sharing this tutorial with the following:

CraftOManiac
TaterTots and Jello
Design Dazzle
Uncommon Designs
Savvy Southern Style
The 36th Avenue
Five Days, Five Ways
French Country Cottage
I Should be Mopping the Floor
At the Picket Fence
Between Naps on the Porch
Stringtown Home
Claiming Our Space

Sunday, August 12, 2012

Bolster pillow tutorial.....Quick, fast and easy!

We have been busy revamping Ms. M's room! We have already painted it a beautiful gray color, added some really cute wall decorations, and have re-done her dresser! She's going for an elegant but still-girly french motif, with a pop of HOT PINK! Yeppers, that's right, HOT PINK! :)

Here's a quick and SUPER EASY PEASY bolster pillow tutorial for ya. I used what I had left of some cotton duck material that I purchased at Hobby Lobby about 2 years ago. The length was 38", but I'm sure when I purchased it it was longer, but it still made for a really nice-sized bolster for her bed! I also had a pillow that we no longer used, so I cut off the cover and used it for the stuffing! Reuse, reduce, recycle! Oh, and can you say FRUGAL?????LOL!

I love being able to use what I already have at home! It's a challenge for me, because if you're like me, I LOVE LOVE LOVE to go out and purchase new "stuff!". This time I was able to use what I had and I'm pleased with the results. Ms. M was thrilled with her pillow, I guess it was the squeal that gave it away!

Thanks so much for stopping by! Sharing this quick tutorial with the following awesome link-up parties!

CraftOManiac
TaterTots and Jello
Design Dazzle
Uncommon Designs
Savvy Southern Style
The 36th Avenue
Five Days, Five Ways
French Country Cottage
I Should be Mopping the Floor
At the Picket Fence
Between Naps on the Porch
Stringtown Home
Claiming Our Space

Wednesday, August 8, 2012

Beach inspired pianoscape........ DONE!

WHEW! Yep, took me long enough (now that schools fixin' to start and fall's just right around the corner), but better late than never's what I say!


As always, I wanted to do a pretty pianoscape that didn't break the bank. It's soft, simple and pretty. I love the pops of turquoise and yellow. But ya gotta love the soft tans/whites too! YUM!

I reused my favorite twin frames (got them for a steal for .50 each at an estate sale and whitewashed them).

Used my Silhouette to create the light house and anchor with "summertime" underneath.


.80 seablue glass votives and a $2.00 bag of shells from Michael's placed in my dollar store apothecary jars


$1.20 for 3 starfish (at Michael's)


Hmmmm, I wonder if I should bring my wreath inside and add to this? Yes?? No??


As always, I really appreciate you stopping by! Why don't you say "HEY" while you're here and let me know where I can see some of your decorating goodies?

I'm sharing this decorating idea with the following link-up parties:

CraftOManiac
TaterTots and Jello
Design Dazzle
Uncommon Designs
Savvy Southern Style
The 36th Avenue
Five Days, Five Ways
French Country Cottage
I Should be Mopping the Floor
At the Picket Fence
Between Naps on the Porch
Stringtown Home

Tuesday, July 31, 2012

Dresser makeover.........

We’ve got a couple of projects going this summer! It’s been fun and we’re trying to get these things done by the time the kiddos go back to school. (Hopefully not just wishful thinking, LOL!)

We recently painted Ms. M’s room a pretty grey color (post coming soon with pics) and she decided to do a more “grown-up” look. We looked through different images online, and she really liked the fleur de lis! She also loves the damask look as well. I told her she was going for a French-country kind of feel for her room (of course, she looked at me kinda puzzled, but I’ve seen that look before) {Well, maybe she was just looking at me saying “Gees Mom, you’re crazy”, but I’d like to think the former, rather than the later!}

Anywho, she had a dresser that we had painted white about a year ago, and, of course, it’s gotten chipped a little, but that “chipped” look is so in right now (which is good, ‘cause I didn’t feel like repainting it anyway). We gave it a facelift with some of the leftover paint on the front of the drawers, then applied some fleur de lis in white vinyl (oh yeah baby, I LURVE my Silhouette!). This was my first project with vinyl, and I can see that I’ll be putting vinyl on anything that will stay still long enough **snicker**. Love, love, love!!!!! This is how it came out……..


We bought this dresser for $40.00, so with some leftover white paint and paint from her room re-do, we don't have too much $$$ in this and it's a great addition to her room! I love frugal decorating :) AND, we’re still not done! Ms. M. came up with a cute idea for the other two drawers, and we’ll let you see that one tomorrow! (I know, I’m such a teaser!)

I'm sharing this decorating idea with the following link-up parties:

CraftOManiac
TaterTots and Jello
Design Dazzle
Uncommon Designs
Savvy Southern Style
The 36th Avenue
Five Days, Five Ways
French Country Cottage
I Should be Mopping the Floor
At the Picket Fence
Between Naps on the Porch
Stringtown Home
Be sure to go by and see all of the other great ideas for DIY crafting!

Sunday, July 29, 2012

More beach-themed items.........

I’ve been trying all week to get my items together for my beach pianoscape, but with all of my best intentions, I still haven’t pulled it together. I’m looking for that one piece, you know, the one thing that will just pull everything together, but I haven’t found it yet! LOL!

Here are a couple of the elements I have so far

Pretty sea blue glass votives: got these at Michaels for 60% off of the $1.99 price tag. Not too bad for .80 each and I know I’ll be able to reuse them for something else (probably 4th of July and January for a snowflake theme).

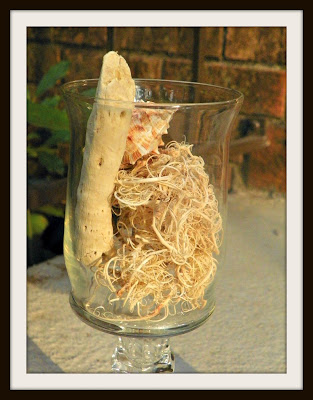
I also got a bag of shells at Michaels, in their $2.00 section, with a bunch of pretty ones! And a couple of pieces of drift wood! I didn’t want a huge bag of them, so this worked out perfectly!


Do y’all have any ideas on what that “ONE PIECE” could be? I really want to wrap up this pianoscape this week. We have painted my daughters room, so I need to get busy decorating that !

I'm sharing this decorating idea with the following link-up parties:

CraftOManiac
TaterTots and Jello
Design Dazzle
Uncommon Designs
Savvy Southern Style
The 36th Avenue
Five Days, Five Ways
French Country Cottage
I Should be Mopping the Floor At the Picket Fence Be sure to go by and see all of the other great ideas for DIY crafting!

Tuesday, July 24, 2012

Starfish wrapped candles...... beach theme #1

Here's one of my first project that I completed (super duper fast too!) for my Beach-themed pianoscape that I'll be working on this week.

I bought these two pillar candles at Dollar Tree (the best thing is, you can reuse these candles for ever, so it's just the initial $2.00 expense!). I had some of the awesome fabric leftover from my Photo Pillow project and my Beach insprired wreath to wrap around the candles. I hot glued the piece on (just where the fabric overlaps each other, that way I can take these off to reuse the candle), then attached the starfish. Easy-peasy decorating! These starfish were only .40 each, so basically under a $1.00 for this project (of course, if you need to go out and purchase the candles it will be a $3.00 project! LOL!).


Please stop by each day as I try and get another beach-themed idea for you!
Linking up to these great decorating parties:

CraftOManiac
TaterTots and Jello
Uncommon Designs
Savvy Southern Style
The 36th Avenue
Five Days, Five Ways
French Country Cottage
I Should be Mopping the Floor
At the Picket Fence

Friday, July 20, 2012

Beach-time Door Wreath

It's Beach time!! Yep, you can say I'm a little behind on my summer decor, but ya know, down here in the deep south, summer is here for a while!

As always, I thought about this theme and color combo waaaayyyyyy back in February, but I'm just now getting to it (better late than never!) And, I have a new TOY that is making this a little bit more fun to put together!


Yep, that's right my friends, a brand-spankin' new Silhouette CAMEO! My mom and dad surprised me with it last weekend, and me and Ms. M. have had a great time making its aquaintance. There is so much I can do with this machine, I just haven't had a chance to sit and play with it like I'd like to. It helps a little today as I have every single one of my orders done and shipped!

I've seen all of those pretty yarn-wrapped wreaths and just had to make one myself! I used a $1.00 pool noodle for the base, I had a big ball of white yarn already, and bought 1/4 yard of both turquoise and yellow felt for the felt flowers (and I have plenty of felt left over for another project!). I purchased a box of 3 star fish at Michaels in the $$$$ section ($2.00, with a 40% coupon). I had the muslin-like fabric from my photo pillow project for the banner, so I was ready to go.


Yep, I used my new toy to make the cute letters on the banner(the font is called Strawberry limeade, available for free at fontspace!) I made them with the self adhesive cardstock paper.


As always, I can't thank you enough for stopping by! I've got a beach-themed pianoscape that I'll have pictures of starting Monday! Hope to see you back then!

I'm sharing this decorating idea with the following link-up parties:

CraftOManiac
TaterTots and Jello
Uncommon Designs
Savvy Southern Style
The 36th Avenue
Five Days, Five Ways
French Country Cottage
I Should be Mopping the Floor
At the Picket Fence

Friday, June 29, 2012

4th of July Decorating Ideas

I wanted to make sure that you get a chance to see the 4th of July ideas that I have made in one place!

Painted Canvas Flag


found HERE

Free Subway Art Printable

Found HERE

Dollar Tree decorating

Found HERE

I hope this helps in your last-minute decorating! Linking up with the following AWESOME link-up parties:

CraftOManiac
TaterTots and Jello
Design Dazzle
Uncommon Designs
Savvy Southern Style
The 36th Avenue
Five Days, Five Ways
French Country Cottage
I Should be Mopping the Floor At the Picket Fence

LinkWithin

Related Posts Plugin for WordPress, Blogger...
UA-9462558-2